Web Chat Widget
Add an AI-powered chat widget to any website. Visitors chat directly from your site, AI replies instantly, and every conversation appears in your SendHub inbox alongside WhatsApp messages.
How It Works
- Enable the widget on a channel in your SendHub dashboard
- Copy the embed code and paste it into your website’s HTML
- Visitors chat with your AI agent directly from your site
- Conversations appear in your SendHub inbox, tagged as
web - Your team can take over from AI at any time, just like WhatsApp conversations
The widget uses the same AI configuration as your WhatsApp channel — same prompt, same knowledge base, same behavior.
Setup
1. Enable the widget
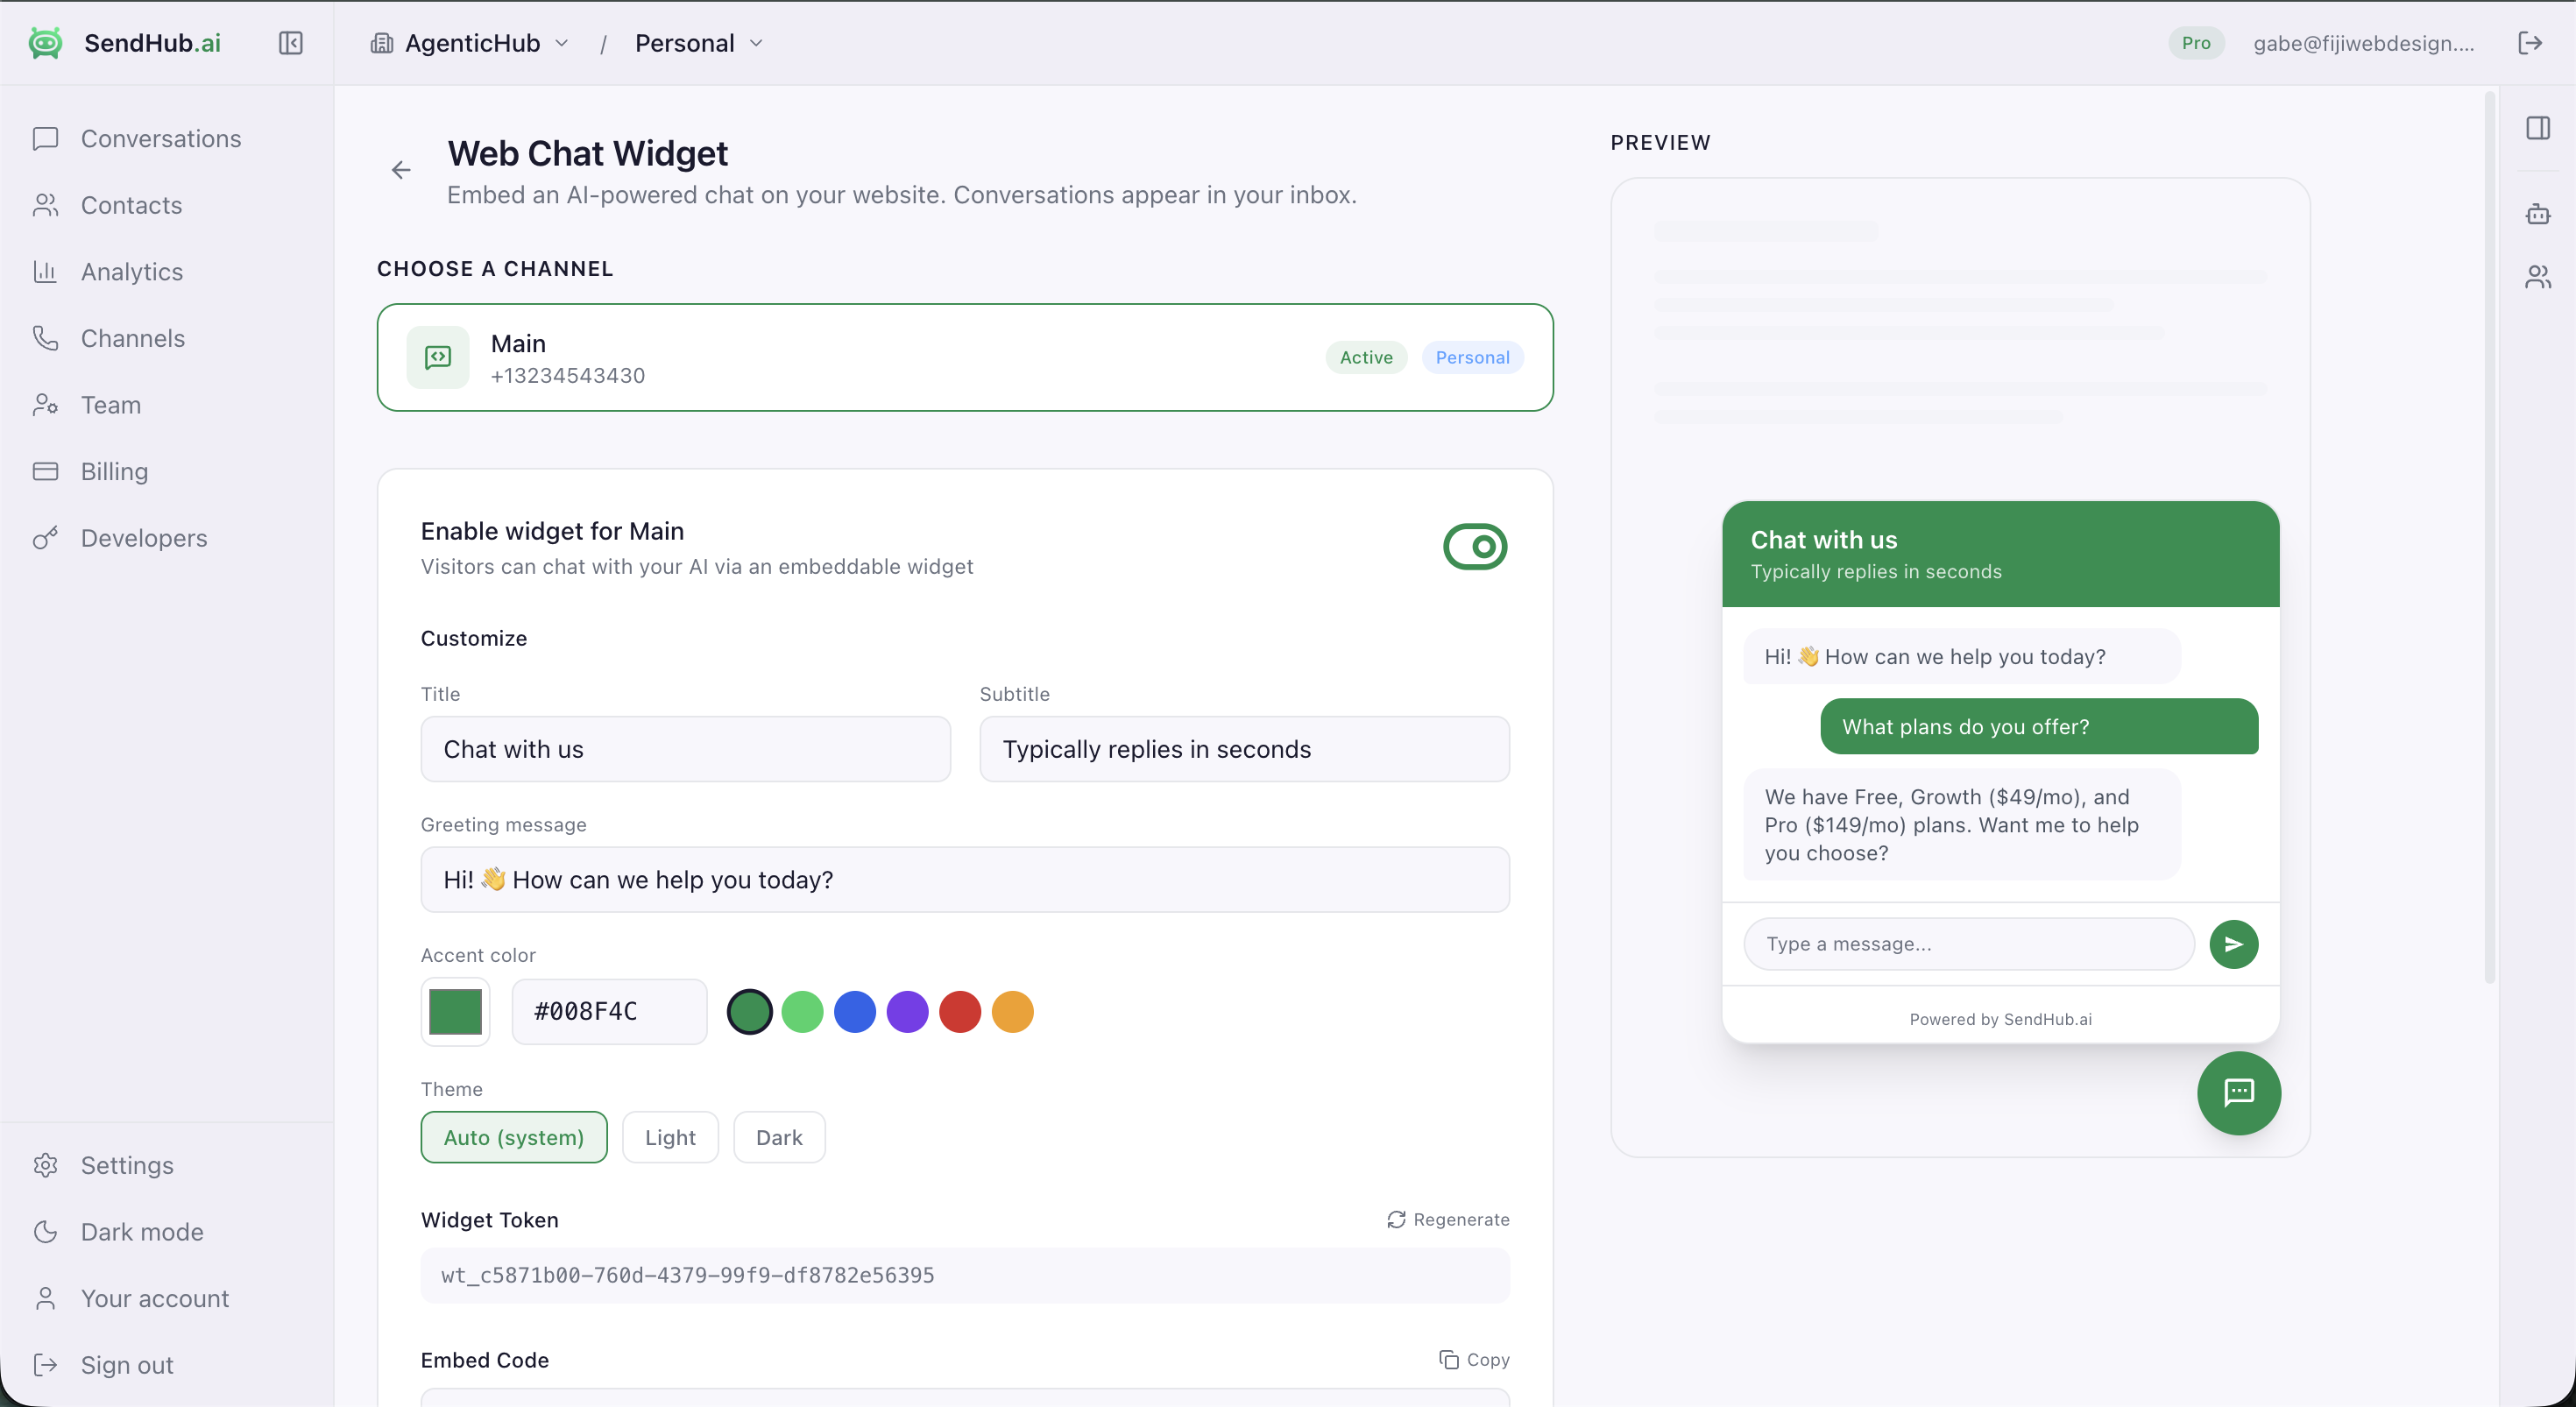
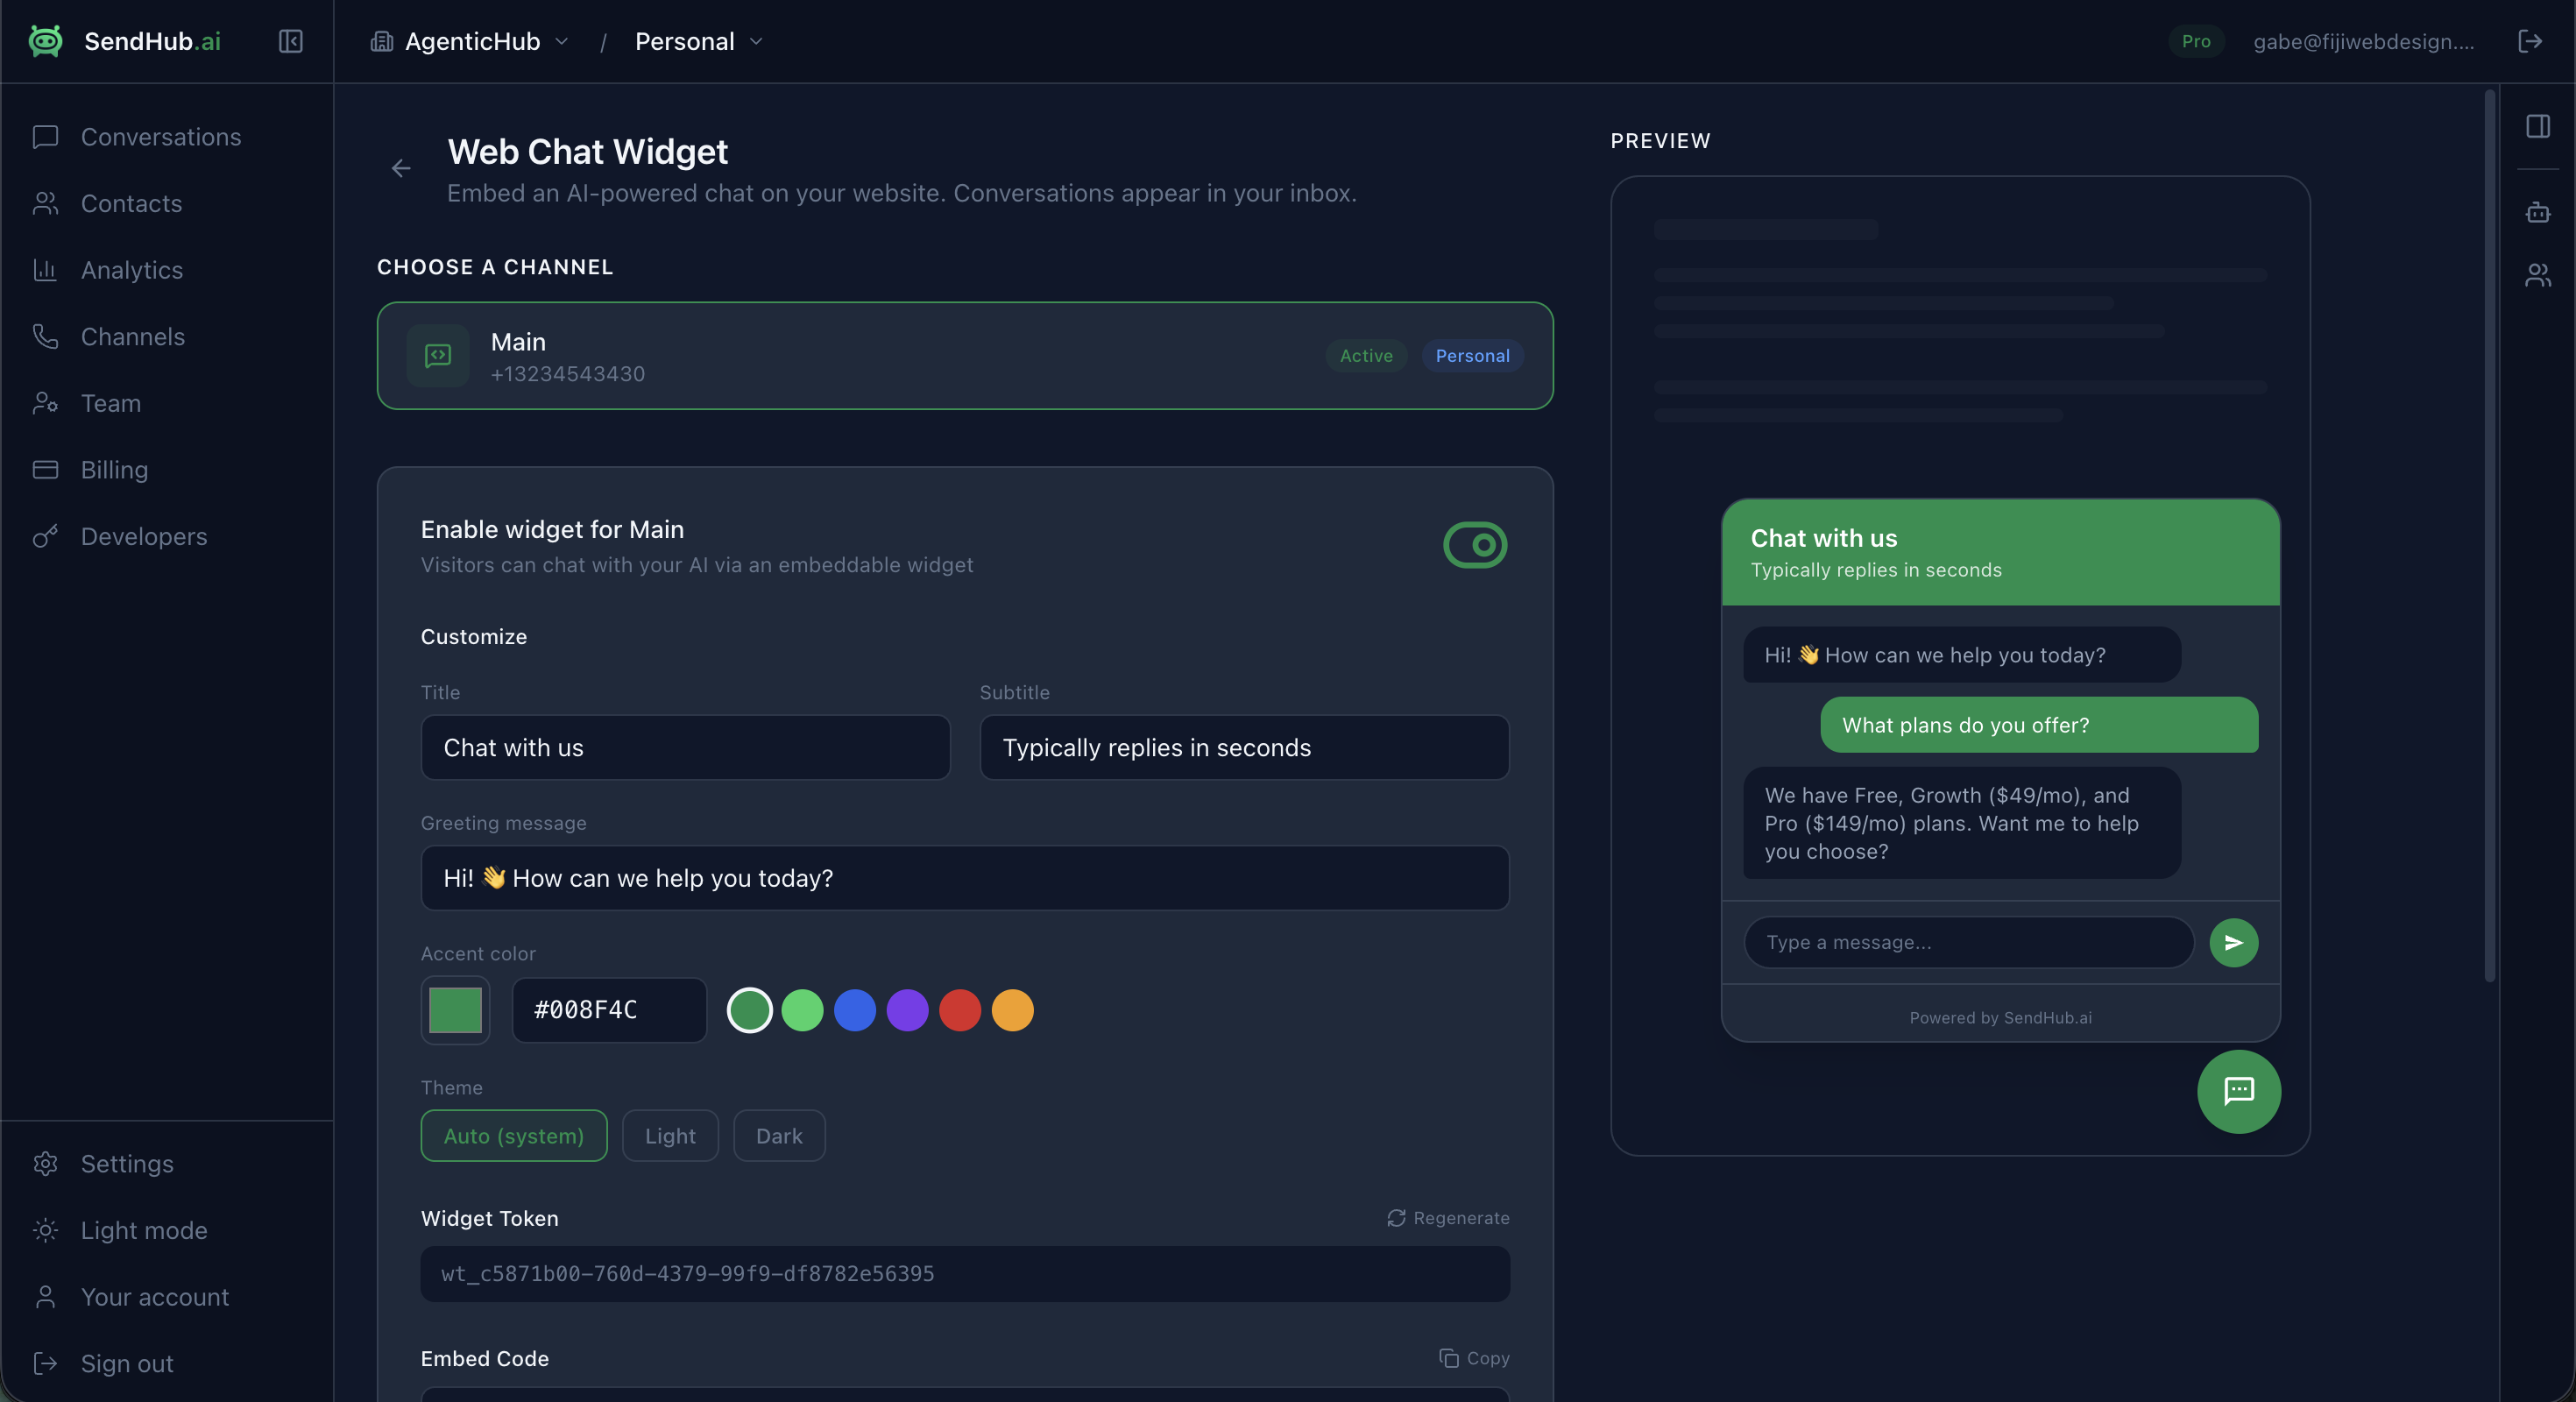
Go to Developers > Web Chat Widget in the SendHub dashboard and select the channel you want the widget to use. Toggle Enable Widget to generate a widget token.
2. Customize appearance
Configure these settings in the dashboard:
| Setting | Default | Description |
|---|---|---|
| Title | Chat with us | Header text shown at the top of the chat panel |
| Subtitle | Typically replies in seconds | Secondary text below the title |
| Greeting | Hi! How can we help you today? | First message the visitor sees |
| Color | #008F4C | Accent color for the chat bubble and header |
| Theme | Auto | auto, light, or dark — auto follows the visitor’s system preference |
3. Add to your website
Copy the embed code from the dashboard and paste it before the closing </body> tag on your website:
<script
  src="https://sendhub.ai/widget.js"
  data-token="wt_your_token_here"
  data-color="#008F4C"
  data-title="Chat with us"
  data-subtitle="Typically replies in seconds"
  data-greeting="Hi! How can we help you today?"
  data-theme="auto"
  async
></script>
That’s it. The widget will appear as a floating chat bubble in the bottom-right corner of your site.
Configuration Options
All configuration is done via data- attributes on the script tag:
| Attribute | Required | Default | Description |
|---|---|---|---|
data-token | Yes | — | Your widget token (starts with wt_) |
data-color | No | #008F4C | Accent color (any valid CSS color) |
data-title | No | Chat with us | Chat panel header title |
data-subtitle | No | Typically replies in seconds | Header subtitle |
data-greeting | No | Hi! How can we help you today? | Initial bot greeting message |
data-theme | No | auto | Color scheme: auto, light, or dark |
data-position | No | right | Bubble position: left or right |
data-api | No | https://api.sendhub.ai | API endpoint (for self-hosted setups) |
How Conversations Flow
Visitor lands on your website
        |
        v
Widget loads, shows greeting message
        |
        v
Visitor types a message
        |
        v
Message sent to SendHub API
        |
        v
AI generates reply using your channel's prompt
        |
        v
Reply shown in widget + saved to inbox
        |
        v
Conversation visible in SendHub dashboard
(your team can take over at any time)
Web contacts
When a visitor chats through the widget, SendHub creates a web contact with a session-based ID. The contact is tagged with platform: web so you can distinguish web visitors from WhatsApp contacts in your inbox.
Sessions persist via localStorage — if a visitor returns to your site, they’ll see their previous conversation and continue where they left off.
AI replies
The widget uses the same AI engine as your WhatsApp channel:
- Uses the channel’s AI prompt (or business-level prompt if no override)
- Includes conversation history for context (last 20 messages)
- Passes the page URL the visitor is on, so the AI can reference it
- Respects confidence thresholds and draft mode settings
Security
The widget token (wt_...) is a public, channel-scoped token. It is safe to expose in your HTML source code.
| Token Type | Scope | Exposure | What it can do |
|---|---|---|---|
| Widget Token | Single channel | Public (in HTML) | Send messages to that channel only |
| API Secret Key | Entire org | Server-side only | Read/write all data |
Even if someone extracts your widget token from your page source, they can only send messages to that specific channel — the same as any visitor chatting on your site.
Shopify
If you use Shopify, you can add the chat widget through the Shopify Theme Editor instead of editing HTML:
- Install the SendHub Shopify app
- Go to Online Store > Themes > Customize
- Add the SendHub Chat Widget block
- Configure your WhatsApp number and appearance settings
The Shopify widget includes additional context — it passes product information and order history to the AI so it can answer questions about specific products or orders.
Framework Guides
Next.js / React
Add the script tag to your root layout or use a useEffect:
useEffect(() => {
  const script = document.createElement('script')
  script.src = 'https://sendhub.ai/widget.js'
  script.async = true
  script.dataset.token = 'wt_your_token_here'
  script.dataset.color = '#008F4C'
  document.body.appendChild(script)
  return () => { document.body.removeChild(script) }
}, [])
WordPress
Paste the embed code in Appearance > Theme Editor > footer.php before </body>, or use a plugin like Insert Headers and Footers.
Webflow / Squarespace
Add the embed code to your site’s Custom Code section in the site settings (before </body>).
Troubleshooting
Widget doesn’t appear
- Check that
data-tokenis set and the channel has widget enabled - Verify the channel is active in the dashboard
- Check the browser console for errors
AI doesn’t reply
- Ensure the channel has an AI prompt configured (or the business has a default prompt)
- Check that the AI worker is running and connected
Messages don’t show in inbox
- The conversation should appear under the channel the widget is linked to
- Look for contacts with
platform: webin the Contacts page